
There are just six days until Christmas! Are you ready? In case you need a last-minute gift, here’s a great idea for you. A friend of mine wanted me to help her create some family history prints for her siblings and parents. I love what we came up with so I made one using my ancestors and I’m excited to share a template for you to use if you would like to create one too!
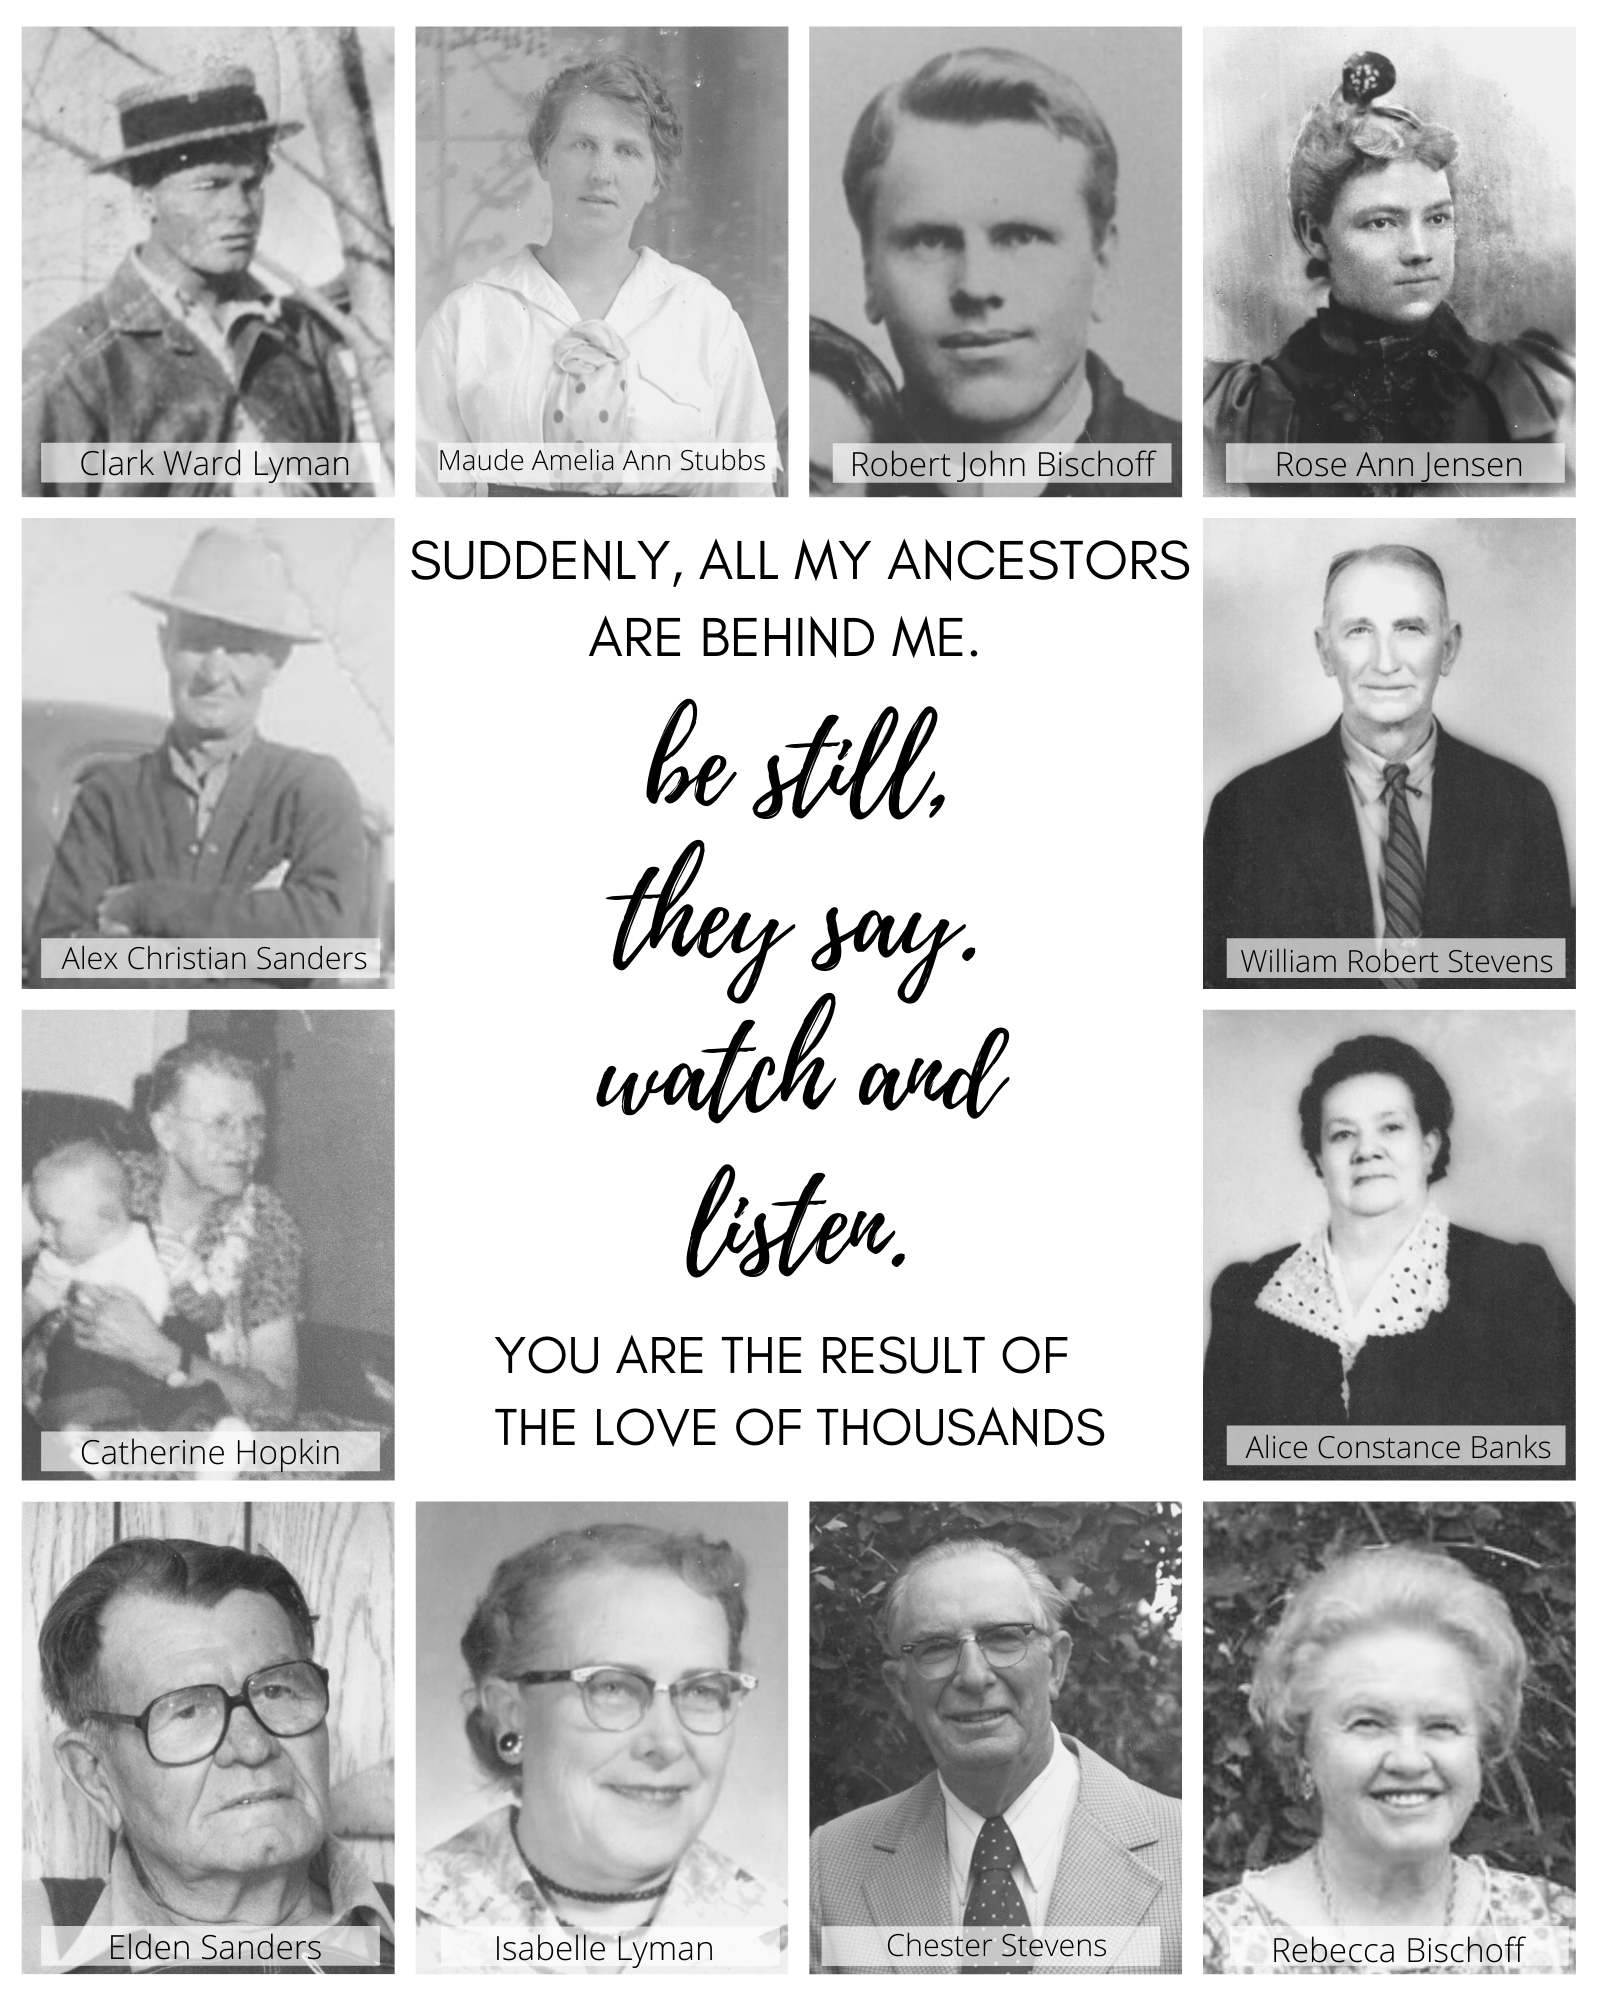
I used Canva to create a template for this project. Once I had the template, it was easy to drag and drop photos into the appropriate frames and label them. In fact, after delivering the gifts to my friend, we realized I had missed one of the siblings. It took me less than ten minutes to add pictures for the in-law’s side of the family and complete the last print! It really is a quick and easy gift you can throw together at the last minute!
Today I am sharing my template with you along with instructions about how to use it.
When you click the template link at the end of this post, you will be prompted to sign up for a free Canva account, and the template will then open in Canva.
***Important! Once you open the template, you will need to make a copy of it so it saves to your account.
To make a copy of your design, click on “File” found on the status bar, then select “Make a copy.” This will open a new window with a copy of the template saved to your account.

Once you have made a copy, I recommend making a second copy that you will add pictures to. This will keep your personal template in its original state so you use it again if you want to make more than one print.
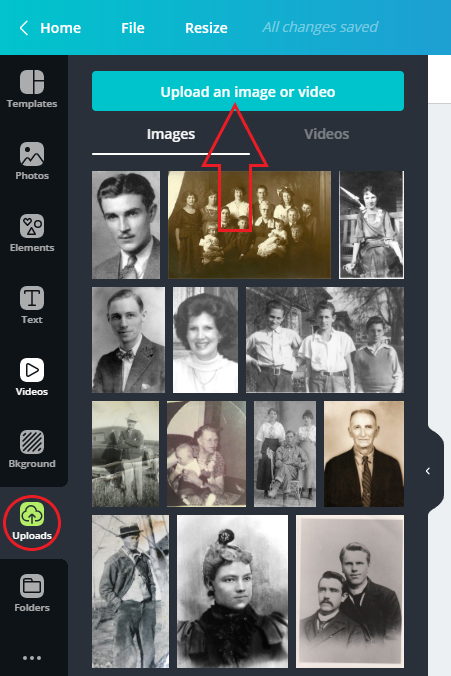
Upload photos in the Uploads section of Canva. Don’t worry about cropping them prior to upload, because it is easy to crop them as you add them to the frames.
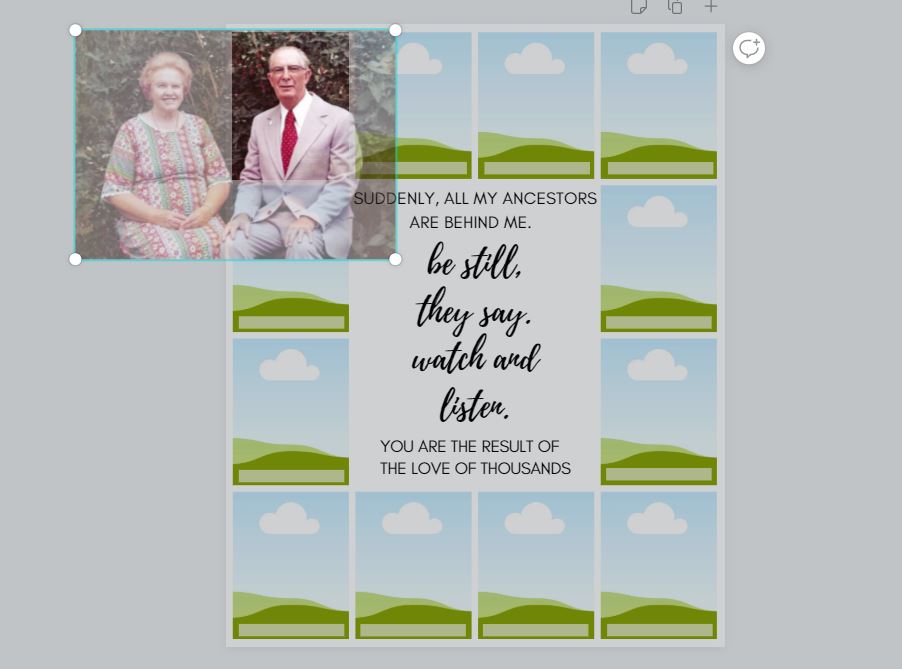
Once your photos are uploaded, drag one into the frame where you want it to appear. It will snap right into the frame. Double click the photo to resize or center it in the frame.
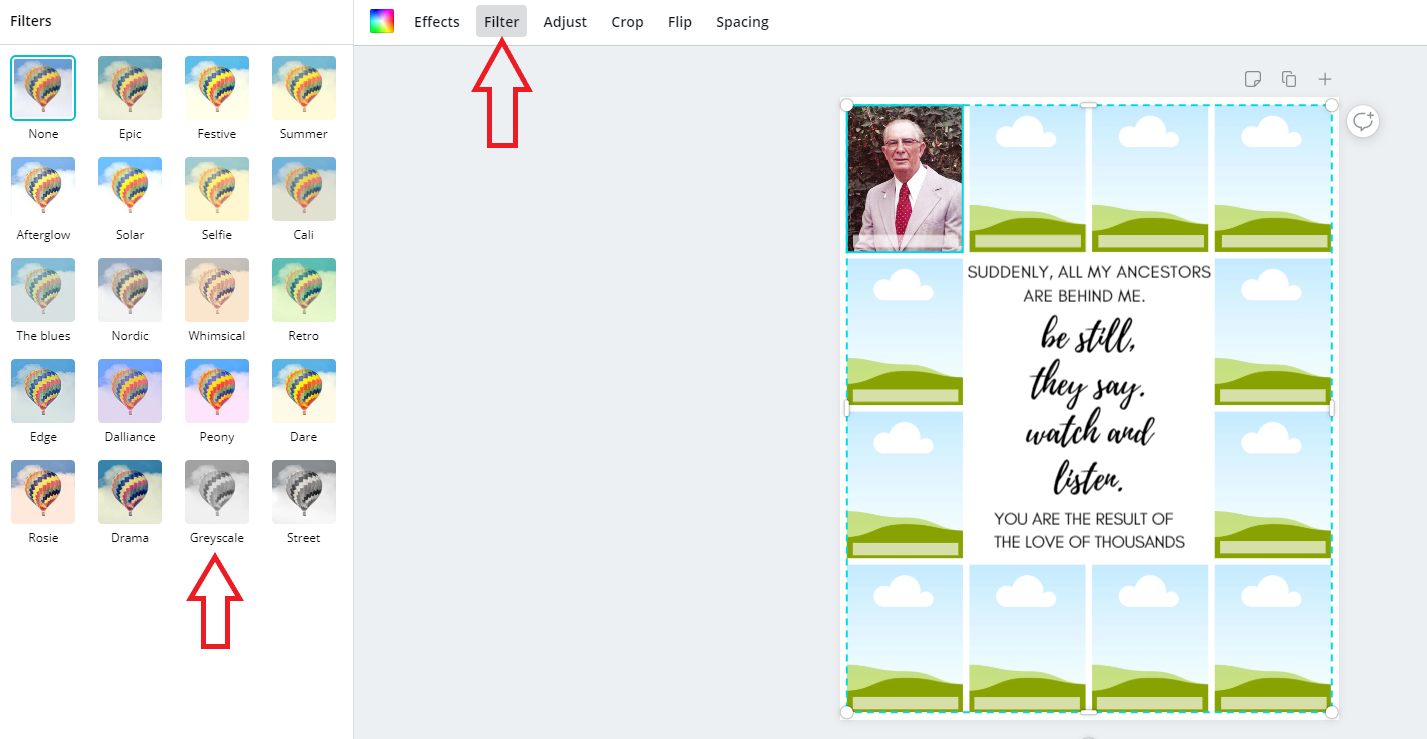
If desired, you can apply a grayscale filter to each picture by selecting the picture then clicking Filter > Grayscale. Having all the pictures in black and white will give the image a more uniform look, but you can certainly leave them in color if you prefer!
Repeat this process until every frame is filled with a photo.
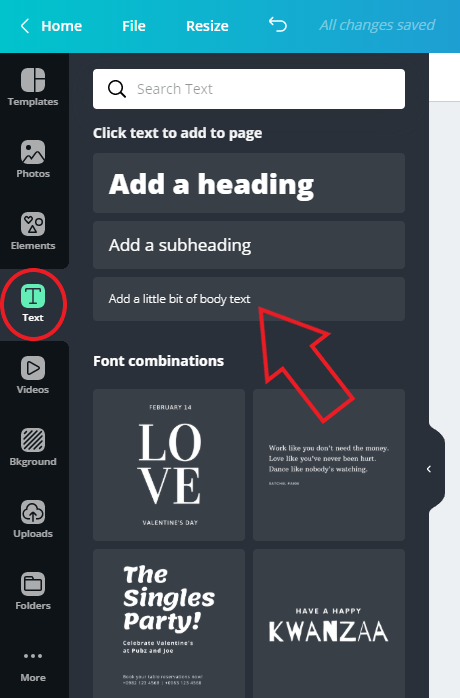
To add names to each picture, click the “Text” button from the menu on the left. Choose “Add a little bit of body text,” type the name, change the font as desired, and drag the text to the label field on the appropriate picture.
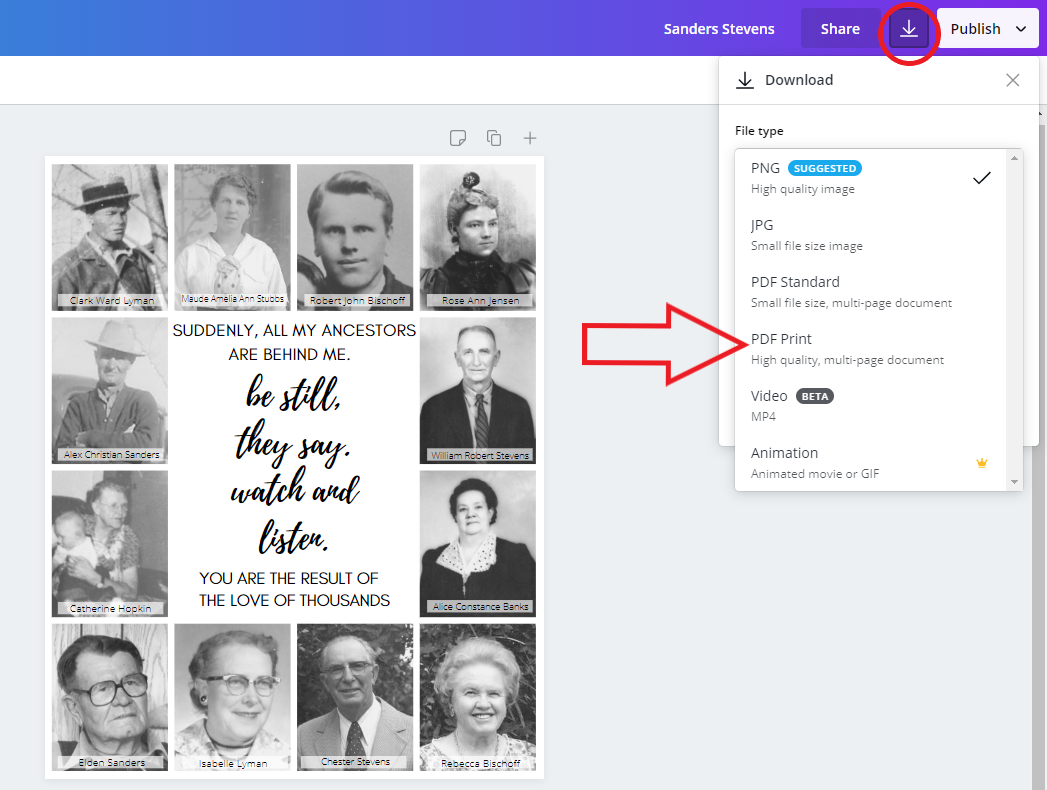
Once you have labeled every photo, click the download button in the upper right-hand corner of the screen. I always download as a “pdf for print” for maximum quality.
Add the files to a flash drive or email them to your favorite print shop. I prefer printing at a print shop over a photo printing service. They have a variety of paper options and they are great with working with pdf files. This project is sized to 8″ x10″. The staff member at the print shop recommended printing two to a page on an 11 x 17″ piece of regular cardstock. Each print ended up costing less than 50 cents by doing it this way. If you are just printing one copy, an 8-1/2″ x 11″ piece of cardstock will be great!
Finally, cut the prints to 8” x 10” and put them in frames. Please note that there is a 1/8” white margin around the outside edges of the print. Don’t cut this margin off! Your print will be smaller than 8” x 10” if you do!
I hope you enjoy this template. If you use it, I would love to see your creations! Share and tag me @AliceChildsGenealogy on Instagram or Facebook! I hope you have a wonderful holiday season!
Template
