Last week I wrote about the importance of keeping a personal record in my article “Tell YOUR Story Too!” Today I’m sharing the way that I have set up my personal journal using Microsoft OneNote. Remember, there is no one right way to keep a journal. This is what works for me. Pick something that works for you and you will be much more likely to stick with it!
To set up a digital journal similar to what I use, navigate to OneNote and sign in using your Microsoft credentials. You can create an account if you don’t have one. If you plan on using a tablet or a smartphone, you will also want to download the OneNote app on your device. To access all the features OneNote has to offer, you can download the desktop app. I use the mobile app for my daily journaling most of the time, so I will demonstrate how to use the app first, with tips on the computer version at the end of the article.
The first step is to sign in to OneNote using your Microsoft User ID and password, or you can create login credentials if you don’t have them. Once you are signed in, create your first notebook. To make printing easier, I’ve decided to create a new notebook for every year, so I named mine 2020 Journal, but you can be as creative as you want with the name of your notebook.
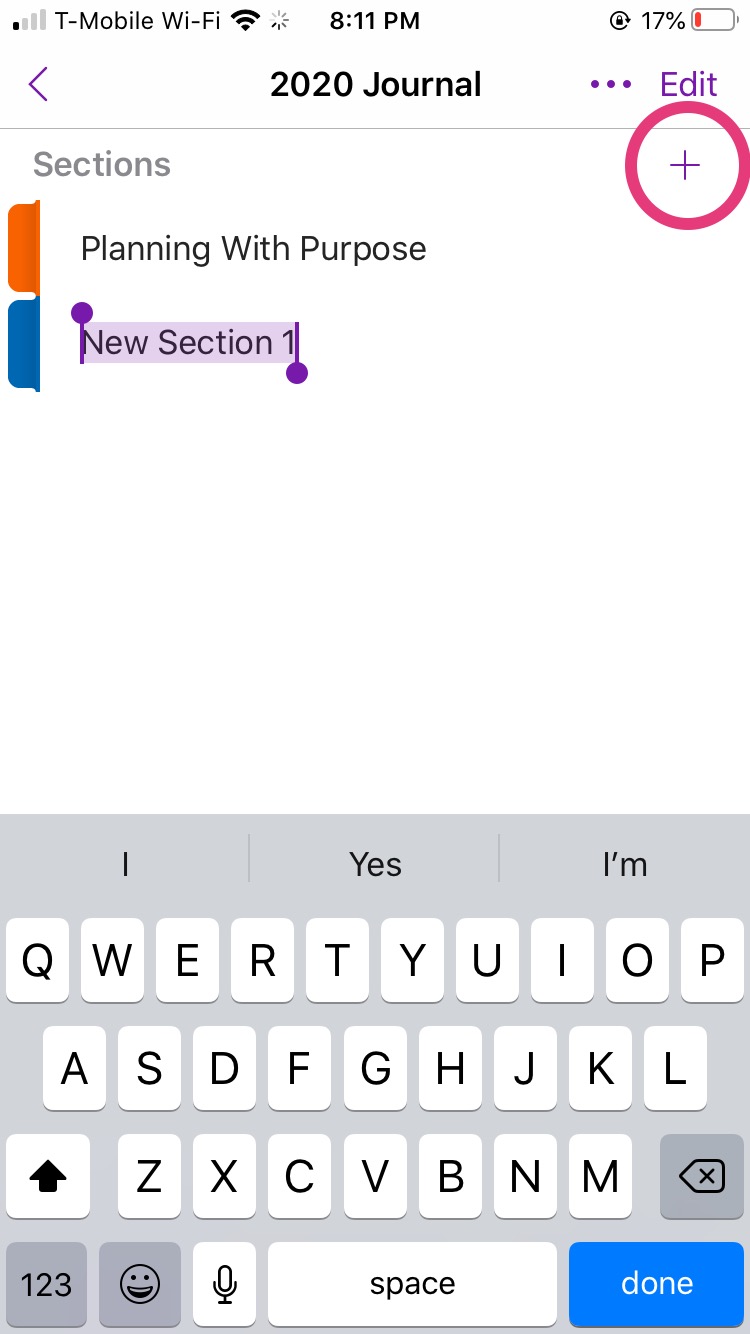
Once your notebook is created, you will be able to add sections. Do this by tapping the + symbol at the top right of the screen, then highlighting the text “New Section 1” that appears and typing in the name of the section. Each section appears with a different-color tab on the left of the screen.
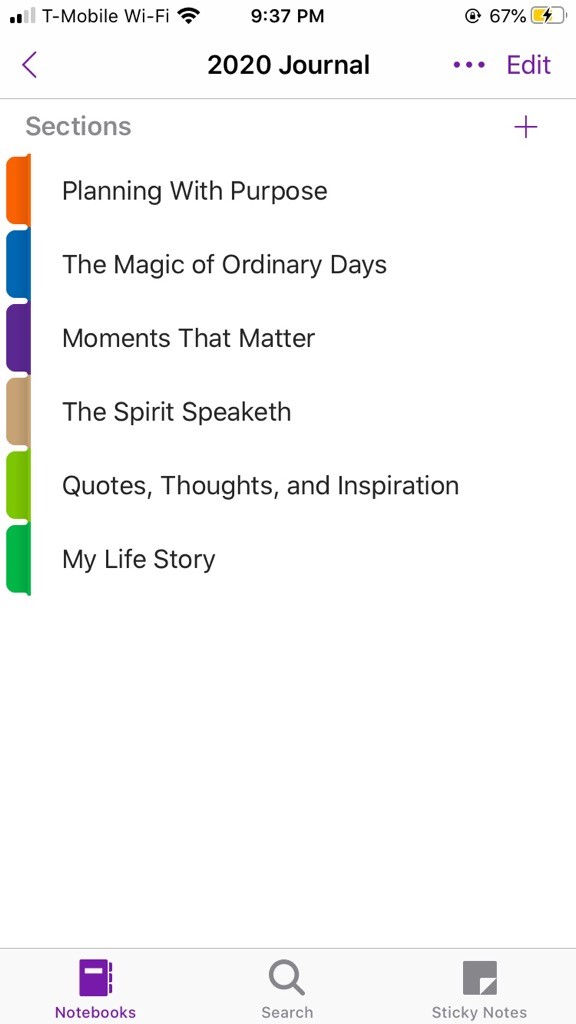
You can see that I have added each of the sections I wrote about in my article “Tell YOUR Story Too” to my journal:
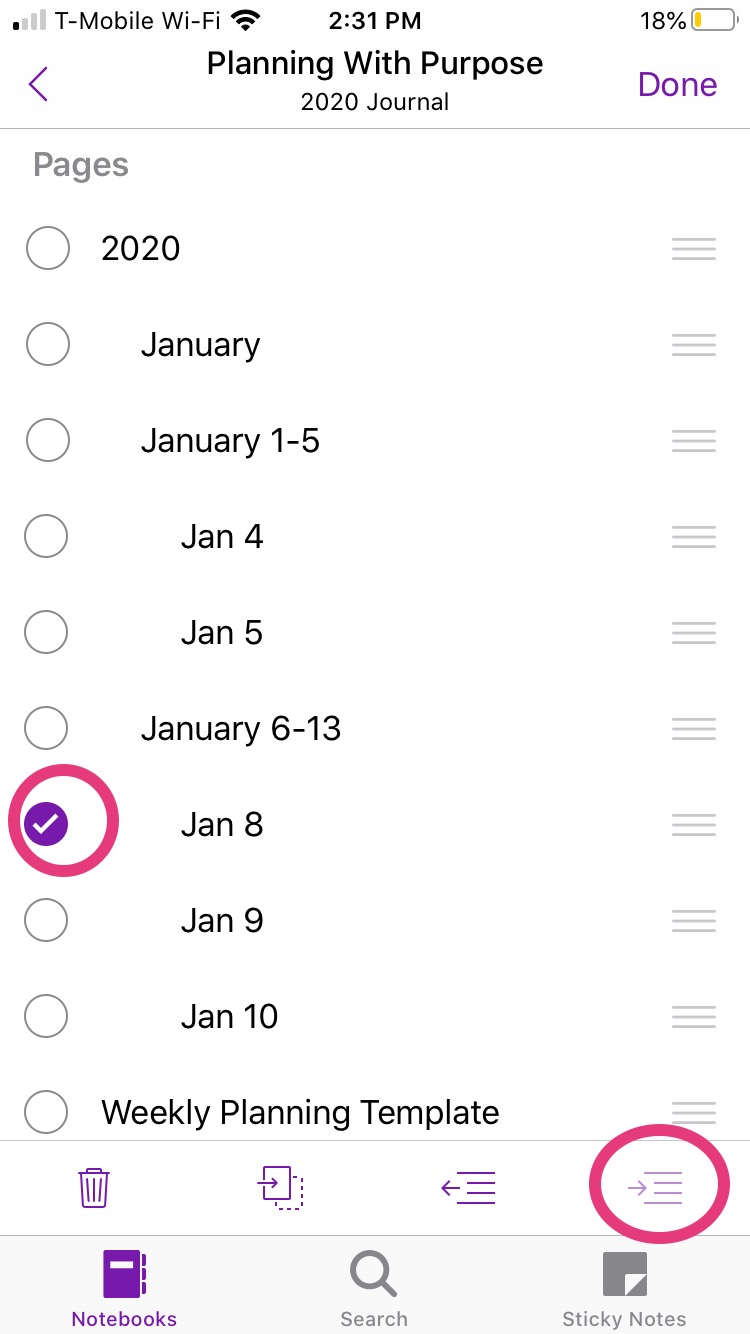
Here’s a look inside my “Planning With Purpose” section.
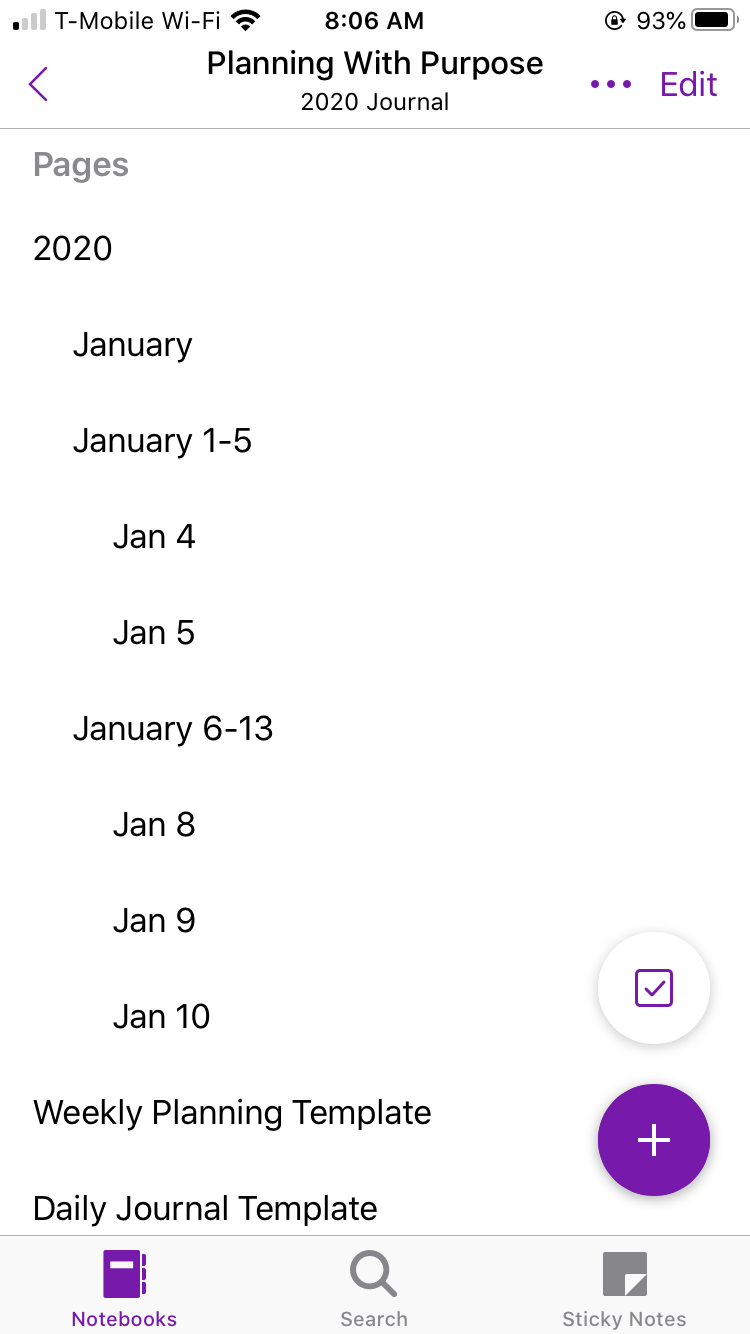
You can add pages within a section by tapping the purple + icon on the bottom right of the screen. I start each year with a yearly planning page and include monthly and weekly planning pages. This helps me pace myself throughout the year and accomplish things a little at a time. You can indent page headings for a more organized look by tapping “Edit” in the top right corner, then selecting an entry and tapping the indent icon at the bottom of the screen. You can also rearrange entries by dragging using the three lines next to any entry. Tap “Done” at the top right when everything is arranged the way you want it.
I have created a template for my daily planning pages:
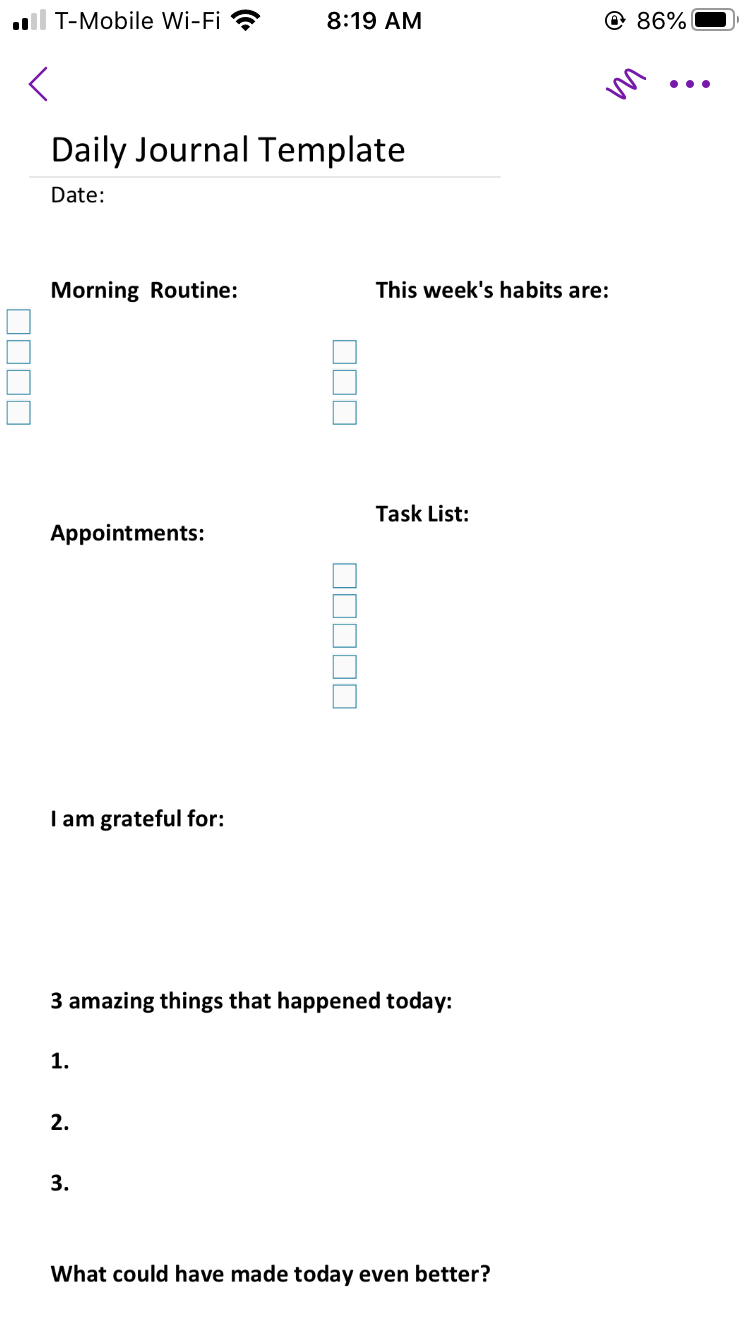
I keep a copy of the template at the bottom of my list of pages. I make a copy of the template each day and give it a heading at the end of the day based on what I think a standout item from the day is. I will use these headings to create a table of contents at the beginning of my journal before I print it next January. *Note: These images are from a mock journal I created for this article, so I don’t have entry headings – just dates.
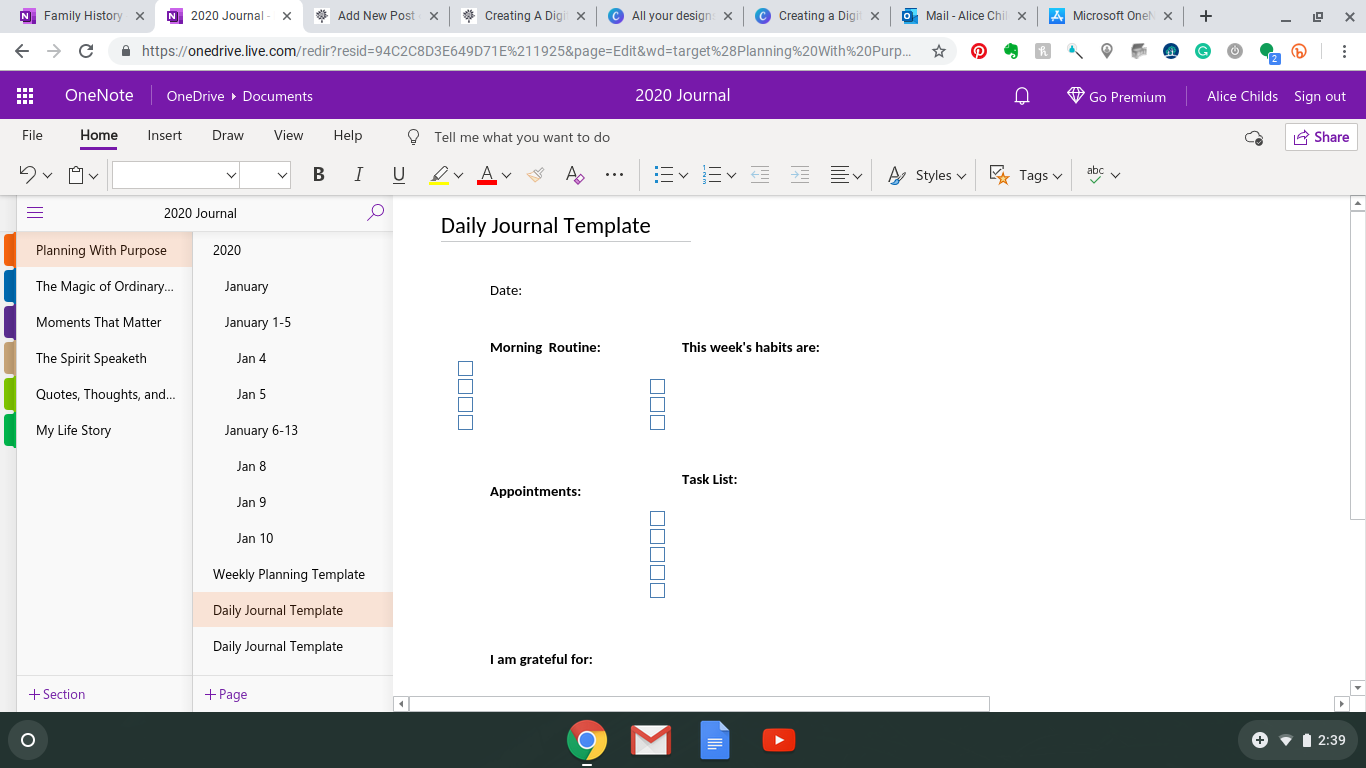
Here is a screenshot of what all of this looks like on the web app on my computer. It is basically the same but your sections and pages show up on the same screen once you open your Journal Notebook. Add pages or sections by clicking the +Page or +Section tab in the appropriate column. Indent by right-clicking on an entry heading and selecting “Make Subpage.”
Finally, it is easy to print a page of your OneNote journal at any time! To print the entire journal with one click, download the desktop app where you can print right from OneNote or “Send” your entries to a word processing application if you want to do a little formatting. Don’t forget to create a table of contents and add it to your journal every year!
Other great features of OneNote that you can play around with:
Speech-to-text capability – You can speak your entries when you don’t feel like typing. I sometimes do this when using my phone because typing on a phone can get tedious.
The ability to add photos – This is a feature I want to use more often this year.
Adding audio to entries or links to websites – obviously this won’t translate over to your printed journal but can be fun within the digital version.
Sharing and Collaborating – You can share notebooks with others, which would be fun if you were working together on a family recipe book, preparing materials, memories, etc. for a family reunion, or anything else you want to collaborate with others on.
The more I use OneNote, the more I love it, and the more I find it is capable of, but I know it isn’t for everyone. I hope that you will find what works for you, because the most important thing is for you to keep your own record. Remember, you have a story, and your story matters!
I’m glad I came across this article! Thank you for the perspective you shared! I was wondering a few things:
1, Do you keep the table of contents as the first page within each section?
2. What does your weekly layout look like? I really like your daily template, and I’ve adapted something similar for myself!
3. Has the feature for indenting pages been removed? I’ve tried to do so in the app on my phone and on the desktop, and it doesn’t allow me to indent.
Adeola,
I’m so happy this article was helpful for you. For the table of contents I have done one table of contents page for the entire year’s journal with headings for each section within the table of contents rather than a separate table of contents for each section. However, the idea of having the first page of each section be the table of contents is a good one! I may have to try that this year!
My weekly layout is simply a checklist of things I want to accomplish during the week. After I make the list I go back and assign days to each item based on what my schedule will allow for. I look at the weekly page every day as I am adding things to my task list on the daily page so I don’t forget anything.
I am still able to indent pages as described in the article. Are you using the mobile app or desktop version?
Thanks again for your comments!
Ah, I see. That makes sense. I think I’ll try both for the next few months and see how I feel. If I like it, I’ll keep both, but if not I’ll choose one! That’s great clarification on the weekly layout.
I use both the mobile app and the desktop version. I can now indent on my desktop version – perhaps I forgot to right-click yesterday! I still don’t see the option on my mobile version, but that’s okay!
Thank you for the quick response!
Hi Alice,
I liked your efforts to guide we guys.
I am using OneNote for Windows 10 & have made a few notebooks. I want to create a weekly (daily too much) journal. I want to make it a part of my autography notebook (unless thing me to create a new Journal Notebook).
I want to use it for general as well as a gratitude/spiritual journal.
Some features like templates etc not visible in Window 10 version.
By the way, why can’t Microsoft merge all versions ie MS office, Windows, android etc a single one?
On android smartphone page sorting ascending. descending capabilities not there.
I am not that great in computing, typing etc. Want to learn Power Point etc. Any free versions of these & template?
Any suggestions?
Thanks
Sam
Hi Sam,
Thanks for your comments! I’m glad to hear you are using OneNote for journaling. I have also noticed that the templates feature is not visible in the Windows 10 version. I got around that by creating pages titled “Daily Journal Template” and “Weekly Journal Template” that simply sit at the bottom of my list of pages. Every time a want to create a new entry, I make a copy of the template and rename the copy with the title of my entry. Then, I can re-order the pages on the list and ensure they are in chronological order by dragging the new page up so it appears above my templates. I hope this makes sense!
Best of luck with your journaling as we enter the new year!
Alice